Saved by the Kale

Healthy living is Happy living

Navigation
  • Home
  • Recipes
    • Appetizers
    • Breakfast
    • Entrees
    • Desserts
    • Gluten Free
    • Juices
    • Side Dish
    • Smoothies
    • Snacks
  • Minimalism
  • About
    • About Jen
    • About Jim
  • Jen’s Favorites
  • Mindful Intentions
  • Contact

3 Ingredient Oreo Truffles

November 26, 2014

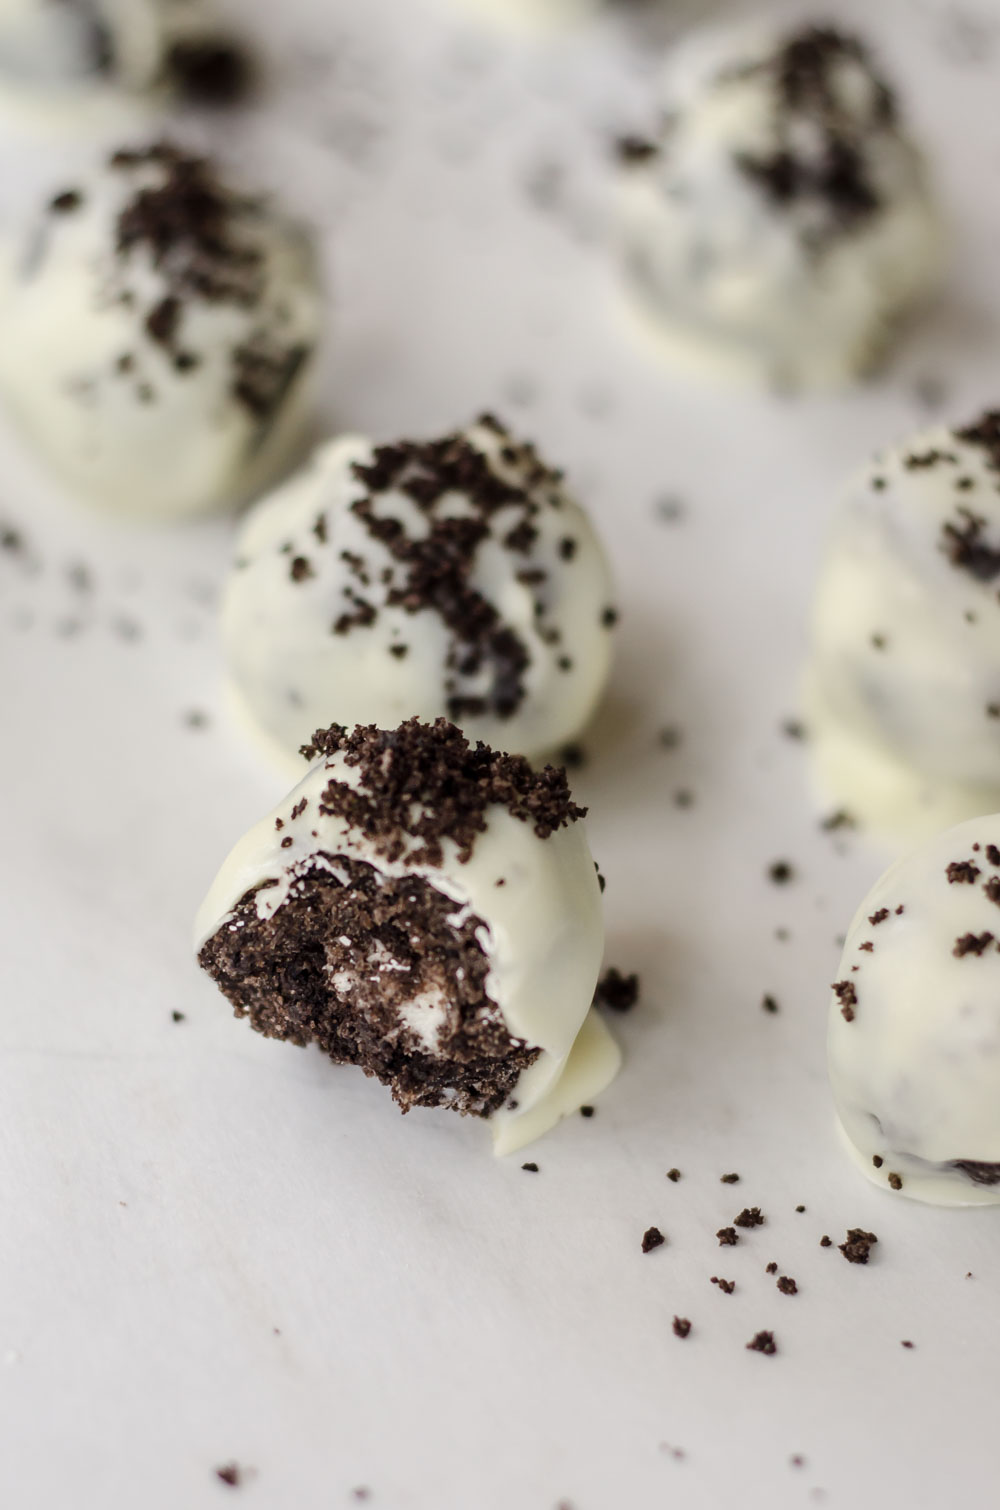
There are always certain foods that I associate with different times of the year. As soon as the Thanksgiving and Christmas holidays come along I think of all things dipped in chocolate. I have several favorites, and they are all very simple to make and taste delicious (more about the others in a later post :)). Sometimes I like to get the kids involved other times I like to turn on some Christmas music, unwind, and dip ALL. THE. THINGS. in CHOCOLATE! Oreo’s have always been one of my favorite cookies and these truffles are like biting into a little piece of heaven! All you need is 3 ingredients and about 30 minutes and you have the perfect holiday treat for parties, school, or to devour yourself.

Oreo Truffles Recipe

photo

3 Ingredient Oreo Truffles
2014-11-25 21:48:43
Yields 27
Easy, Delicious, and always a crowd pleaser! Only 3 ingredients!
Write a review
Save Recipe
Print
Prep Time
10 min
Cook Time
20 min
Total Time
30 min
Prep Time
10 min
Cook Time
20 min
Total Time
30 min
Ingredients
  1. 1 package of Double Stuffed Oreos
  2. 4 oz of cream cheese (softened)
  3. Ghirardelli White Chocolate Melting Wafers
Instructions
  1. Finely chop the entire package of Oreos in a food processor; reserve a little of the crushed Oreo to sprinkle on top of the truffles.
  2. In a bowl mash the softened cream cheese with the Oreos. (Don't be afraid to get your hands dirty!)
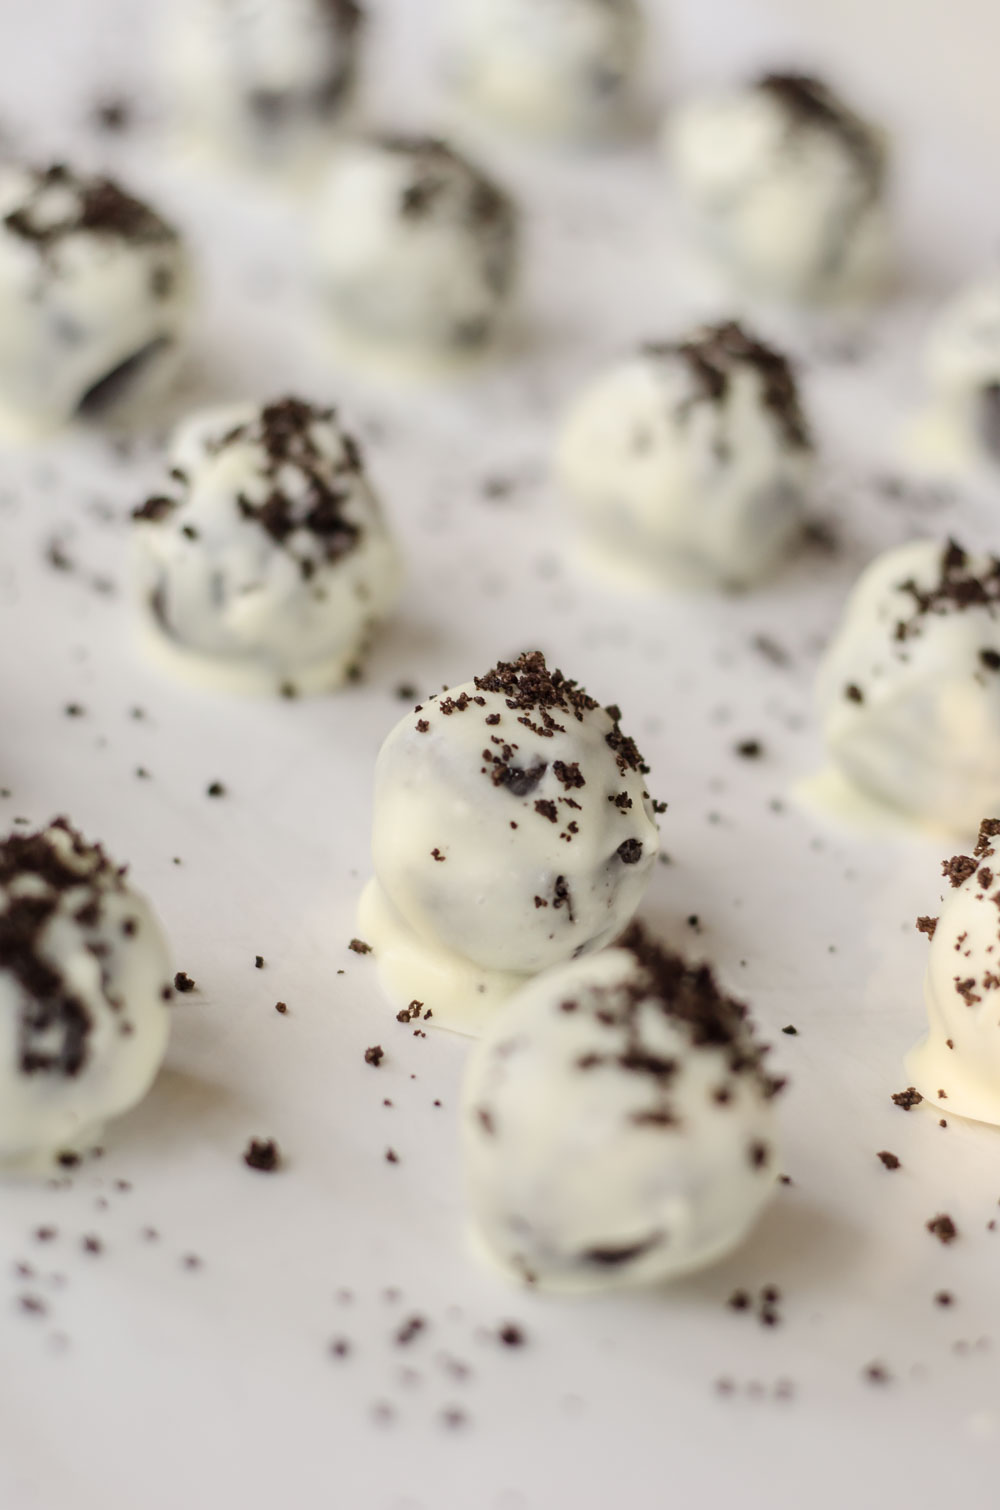
  3. Roll into 1 inch balls and place on a cookie sheet covered with parchment paper.
  4. Place in the freezer for 15 minutes.
  5. Melt the white chocolate using a double boiler.
  6. Dip the balls in the chocolate. Completely cover.
  7. Set them back on the parchment paper and garnish with the extra crushed Oreos before they harden.
  8. Let the chocolate set. I like to place them in the freezer for a few minutes because I want to eat them as soon as possible! Refrigerate and Enjoy!
By Jen @ SavedbytheKale
Saved by the Kale http://savedbythekale.com/
Oreo Truffles

And if you are like us you might want to make a double batch because these little things disappear quickly! Between the 4 of us these don’t last long… which makes me think why do I always wait to this time of the year to make them!?

Filed Under: Desserts, Featured, Recipes, Snacks Tagged With: dessert, holidays, oreo, oreo truffles, truffles

Brussels Sprouts With Cranberry Brown Butter

November 19, 2014

Thanksgiving may be one of the few times a year when you can take your vegetables, smother them with a buttery sauce, and still feel good about it. That’s exactly what we did with our twist on brussels. Nothings screams Thanksgiving quite like cranberries, so we thought, why not spruce up a veggie with some cranberries???

Brussels have definitely grown on me. I wouldn’t touch it as a kid, but I now mostly like it as an adult. It’s still something that I think it’s too bitter to eat straight-up, so I like to add some other strong flavors to help it along. See our bacon & molasses brussels recipe for evidence.

Brown butter is a tasty deliciousness on its own, but the addition of cranberries turns it into a great holiday sauce. The brown butter definitely does not overpower the brussels in this recipe, it gives it just the right balance of sweetness and nuttiness to the dish.

Cranberry Brussels recipe

Brussels Sprouts with Cranberry Brown Butter
2014-11-17 16:05:54
Serves 4
A delicious Thanksgiving-themed twist on sauteed brussels sprouts. Cranberry brown butter adds a holiday flavored twist.
Write a review
Save Recipe
Print
Prep Time
15 min
Cook Time
10 min
Total Time
25 min
Prep Time
15 min
Cook Time
10 min
Total Time
25 min
Ingredients
  1. 1 lb brussels sprouts, thinly sliced
  2. 1 leek, thinly sliced
  3. 1 C cranberries, chopped
  4. 3/4 stick butter
  5. 1 tbsp garlic
  6. 1 tbsp brown sugar
  7. 3 tbsp olive oil
  8. Salt and pepper to taste
For the brown butter
  1. Heat butter in a sauce pan until it starts to brown.
  2. Add brown sugar and cranberries. Cook for 2 minutes.
For the brussels
  1. Heat sautee pan over med-high heat.
  2. Add oil and sautee brussels and leak for 2 minutes, stirring constantly to cook evenly.
  3. Add garlic, cook for 1 minute.
  4. Add brown butter, cook for 3 minutes. Season with salt and pepper to taste.
Notes
  1. I used a mandolin to slice the veggies evenly. It makes them very fine and delicate.
By Saved by the Kale
Saved by the Kale http://savedbythekale.com/
Cranberry Brussels recipe

We’re doing Thanksgiving recipes all week this week. Yesterday we posted our favorite dressing recipe, and there’s still much more to come. Hope you’re enjoying following along!

Filed Under: Featured, Recipes, Side Dish Tagged With: brown butter, brussels, brussels sprouts, butter, cranberries, cranberry

Thanksgiving Week + Decadent Mac & Cheese

November 17, 2014

Let’s be real. Real time with Aunt Jen (it could be a weekly talk radio call-in show). I love Thanksgiving. Everyone I know loves Thanksgiving, no denying that. Everyone makes a big deal out of how thankful they are for everything they have and their family and friends and yada yada yada. I get that, and I’m really thankful too… but people REALLLLLLLY love Thanksgiving because of the awesome eats. If we didn’t have such great traditional foods associated with Thanksgiving then it wouldn’t be nearly as significant a date on the calendar.

When you think about Thanksgiving what immediately comes to mind is lots and lots of delicious turkey, dressing (stuffing for you non-southerners), cranberry sauce (it’s not Thanksgiving without it) and awesome sides dishes. This week on Saved by the Kale we’re going to go full-Thanksgiving with a different dish daily. First up is this totally decadent and delicious version of macaroni and cheese that Jim cooked up over the weekend at our little pre-Thanksgiving dinner.

Decadent Mac And Cheese

This is definitely cheese-overload, so it’s perfect for a splurge-occasion like Thanksgiving. It’s got 3 kinds of cheese, including a smoked gouda that adds a terrific smokiness. We also learned a little trick from Roy’s Hawaiian Fusion and added a little basil to the crust on top to put it over the top.

Decadent Mac & Cheese
2014-11-16 23:19:21
Serves 4
Cheesy and decadent. Smokey and sharp and salty. Everything you could possibly want in mac and cheese. Quite literally the best side dish ever conceived.
Write a review
Save Recipe
Print
Prep Time
5 min
Cook Time
25 min
Total Time
30 min
Prep Time
5 min
Cook Time
25 min
Total Time
30 min
Ingredients
  1. 6 oz smoked gouda, sliced
  2. 7 oz extra-sharp cheddar (white or yellow), sliced
  3. 1/2 C grated parmesan
  4. 5 basil leaves, finely chopped
  5. 6 oz pasta
  6. 1/2 pint cream
  7. 1/2 stick butter
  8. salt to taste
Instructions
  1. Preheat oven to 400F.
  2. Cook pasta according to directions.
  3. While pasta is cooking start making the sauce. Over med-high heat, in a large pan melt butter and add cream. Add cheese and whisk constantly until incorporated and smooth. Check for seasoning and adjust as needed.
  4. Add pasta to sauce and stir to combine. Transfer to a baking dish if needed.
  5. Top with grated parmesan and basil. Bake for 10 minutes or until golden brown on top.
Notes
  1. Any type of short pasta will work here. We opted for rigatoni.
  2. You can use any cheese that you want.
By Saved by the Kale
Saved by the Kale http://savedbythekale.com/
What are your favorite Thanksgiving dishes? What do you immediately think of when someone mentions Thanksgiving?

Filed Under: Featured, Recipes, Side Dish Tagged With: cheddar, cheese, gouda, mac and cheese, seasonal, smoked, thanksgiving

Honey Roasted Pumpkin Seeds

November 5, 2014

We love carving a couple of pumpkins each year for Halloween and now that our girls are getting a little older they are enjoying it too. Well actually they both think it is disgusting reaching in to the pumpkin to pull out the seeds and the flesh. They are a little grossed out by it. Luckily Jim and I don’t mind. He scoops out the flesh and I work on separating the seeds so I can roast them up to have as delicious healthy snack! 

Really the most tedious part of the process is separating the seeds from the flesh, once you’ve done that it’s a piece of cake. You will want to rinse the seeds off, and then place them on a paper towel and blot them dry. What I do is leave mine on the paper towel on the counter overnight so they can dry out. 

PumpkinSeeds-4-2

The next day they are ready for roasting! I decided to do something a little different with mine this year. In the past I have made sweet ones using cinnamon and sugar. I’ve also made savory ones using different seasonings, and I have also made spicy ones. This year I decided on making Honey Roasted Pumpkin Seeds! I couldn’t wait for these to come out of the oven so I could taste test… they had the entire house smelling so good! 

Honey Roasted Pumpkin Seeds

They tasted even better than they smelled, I had to stop myself from eating them so I would have some left to photograph! These are sweet and savory at the same time. The best of both worlds. They are naturally sweetened with honey, so no refined sugars here! 

PumpkinSeeds-18-Edit

Why eat pumpkin seeds? Pumpkin seeds are incredibly good for you. They are packed with magnesium, zinc, and omega 3’s. They are rich in healthy fats, antioxidants, and fiber and they taste delicious! They are definitely the perfect fall snack.

Honey Roasted Pumpkin Seeds
2014-10-29 16:18:59
Crunchy, sweet and savory! The perfect healthy fall snack!
Write a review
Save Recipe
Print
Cook Time
30 min
Cook Time
30 min
Ingredients
  1. 1/2 cup of pumpkin seeds
  2. 2 tsp of honey
  3. 1 tsp of coconut oil (melted)
  4. 1/4 tsp sea salt
Instructions
  1. Separate the pumpkin seeds from the flesh.
  2. Rinse seeds and put them on a paper towel and blot dry.
  3. Let them air dry overnight or for a few hours.
  4. Once they are dry, put them in a bowl.
  5. Preheat the oven to 300 degrees.
  6. Add honey, coconut oil, and salt to the bowl and stir all together.
  7. Line a baking sheet with non-stick foil.
  8. Pour the seeds onto the baking sheet.
  9. Bake in the oven for at 300 degrees for 30 minutes.
  10. Once they come out of the oven sprinkle with a little more sea salt, let them cool and then snack away!!!
By Jen @ SavedbytheKale
Saved by the Kale http://savedbythekale.com/

Filed Under: Featured, Pumpkin Everything, Recipes, Snacks Tagged With: honey roasted, pumpkin, pumpkin seeds

  • « Previous Page
  • 1
  • 2
  • 3
  • 4
  • 5
  • Next Page »

Hi there!

Hi guys, it's Jen!

I love good food and simple living! Keep Reading…

Search Saved by the Kale

  • Email
  • Facebook
  • Instagram
  • Pinterest
  • RSS
  • Twitter
Follow on Bloglovin

Tasty Food Photography eBook

Features

Infinity Jars

Healthier Alternatives to Store Bought Spice Blends

Cast Iron Pan Pizza Recipe

Homemade Buffalo Chicken Pan Pizza

Chocolate Pumpkin Bread Recipe

Chocolate Chocolate Chip Pumpkin Bread

Copyright © 2025 · Foodie Theme by Shay Bocks · Built on the Genesis Framework · Powered by WordPress